Yolo inference C++ example(VS2022+Darknet DLL)
Darknet 프레임워크의 프로젝트에서 DLL을 생성하여 추론하는 과정입니다.
Darknet dll은 GPU용 솔루션과 CPU용 솔루션이 나눠져있습니다. 각 솔루션을 빌드하면 dll파일이 생성됩니다. OpenCV의 GPU 기능을 사용하려면 OpenCV를 빌드할 때 extra 모듈을 추가해서 CUDA관련 모듈을 함께 빌드해야 합니다.
yolo 추론용 DLL은 C++ 클래스 형태로 제공해서 다른 프로젝트로 쉽게 사용할 수 있습니다.
프로젝트는 아래 링크의 프로젝트를 활용합니다.
GitHub - AlexeyAB/darknet: YOLOv4 / Scaled-YOLOv4 / YOLO - Neural Networks for Object Detection (Windows and Linux version of Da
YOLOv4 / Scaled-YOLOv4 / YOLO - Neural Networks for Object Detection (Windows and Linux version of Darknet ) - GitHub - AlexeyAB/darknet: YOLOv4 / Scaled-YOLOv4 / YOLO - Neural Networks for Object ...
github.com
1. DLL 빌드
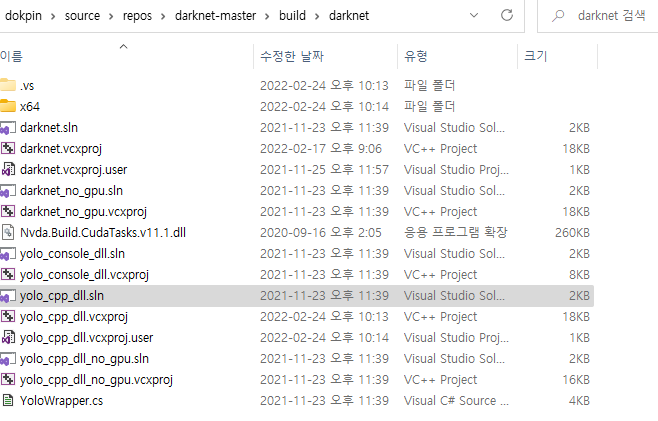
yolo_cpp_dll.sln을 빌드하면 GPU 사용이 가능합니다.(엔비디아 그래픽카드가 없을 경우 yolo_cpp_dll_no_gpu.sln 사용)
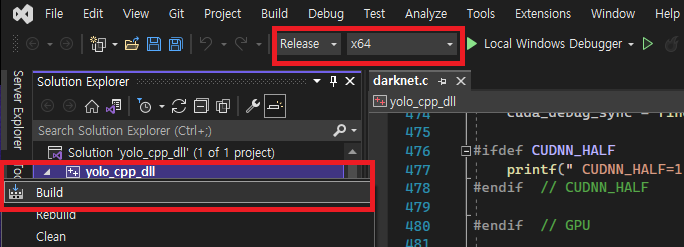
Release로 모드를 설정하고 yolo_cpp_dll 프로젝트를 빌드합니다.
(CUDA 11.01, Visual Studio 2019 or 2022)
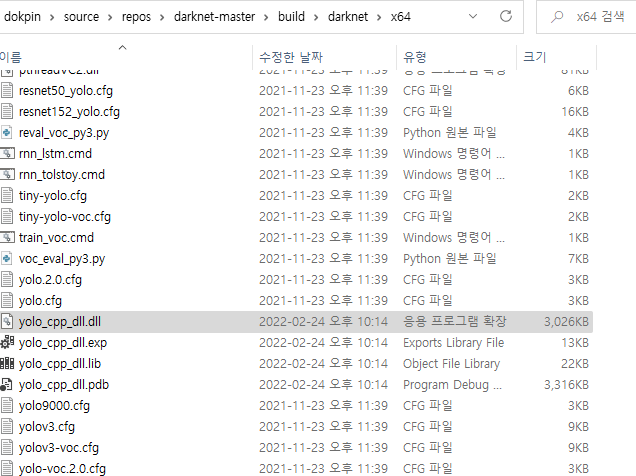
build/darknet/x64에 dll 파일과 lib 파일이 생성됩니다.
2. 새 프로젝트 생성

새 프로젝트 생성 후 프로젝트 폴더에 dll파일들을 넣습니다.
pthreadGC2.dll과 ptrehadVC2.dll은 darknet 프로젝트 폴더 내 3rdparty/pthreads/bin 에 있습니다.
yolo_cpp_dll.dll은 1절에서 빌드한 라이브러리입니다.
opencv_world455.dll은 이미지 출력을 위해 링크했는데 opencv가 없어도 실행됩니다.
2.1 header include
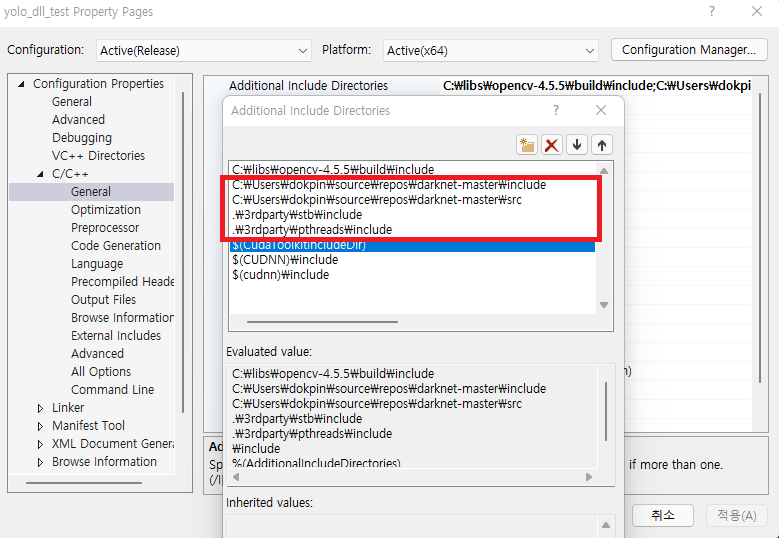
새로 생성한 프로젝트의 속성에서 C/C++ > General > Additional include Directories에 4가지 경로를 추가해야 합니다.
darknet 프로젝트 폴더의 include, src폴더와 3rdparty stb의 include 폴더, pthreads의 include 폴더입니다.
2.2 라이브러리 경로
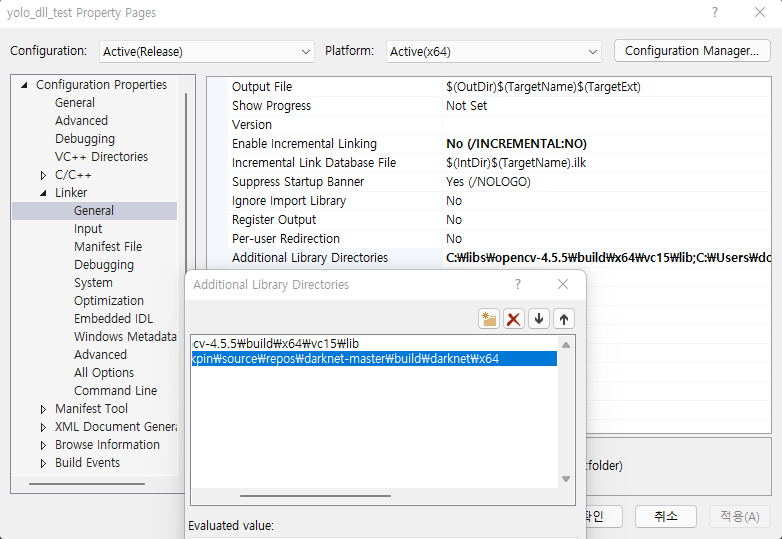
새로 생성한 프로젝트의 속성에서 Linker > General > Additional Library Directories에 darknet dll을 빌드한 결과물이 생성된 폴더 경로를 넣습니다. (*.lib 파일이 있는 경로)

그 다음 Linker > Input > Additional Dependencies에 yolo_cpp_dll.lib를 입력합니다.
3. 실행 결과
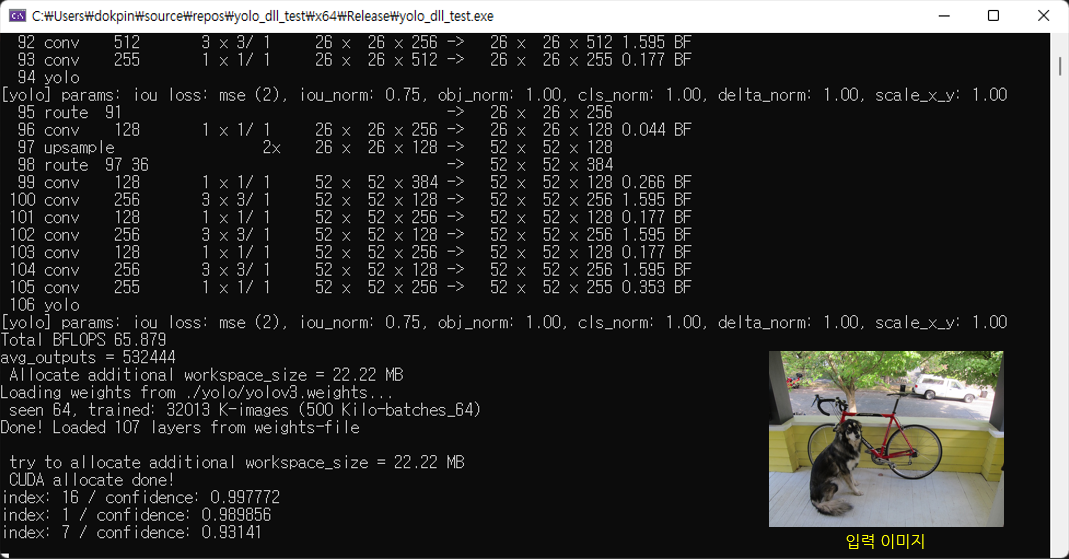
입력 이미지에 대한 분류 결과가 정확도가 출력됩니다. GPU를 활용했다는 것도 볼 수 있습니다.
4. 실행 코드
#include "yolo_v2_class.hpp"
#include <string>
//#include "opencv2/opencv.hpp"

int main()
{
	Detector dt((std::string)"./yolo/yolov3.cfg", (std::string)"./yolo/yolov3.weights");

	std::vector<bbox_t> results;
	results = dt.detect("./yolo/dog.jpg", 0.7);

	//cv::Mat img = cv::imread("./yolo/dog.jpg");

	for (int i = 0; i < results.size(); i++)
	{
		//cv::rectangle(img, cv::Rect(results[i].x, results[i].y, results[i].w, results[i].h), cv::Scalar(0, 0, 255), 3);
		printf("index: %d / confidence: %g\n", results[i].obj_id, results[i].prob);
	}

	//cv::imshow("results", img);
	//cv::waitKey();

	return 0;
}
yolo_v2_class.hpp를 include하면 Detector 클래스를 쓸 수 있습니다.
클래스 선언시, cfg파일과 weights파일을 매개변수로 넣어서 초기화하고
detect() 멤버 함수로 이미지 경로와 threadhold 값이 매개변수로 들어갑니다.
detect() 멤버 함수 내에서 후처리 후에 bbox_t 구조체 벡터로 결과값을 반환해줍니다.
opencv를 include하여 사각형을 출력하거나 다른 영상 처리를 하는데 사용할 수 있을 것 같습니다.